|
|
|
This page describes my attempt to produce a Type I shaving. My knowledge of shaving types has been mostly theoretical, based on reading about them and looking at illustrations. In my own planing experience there was no clear distinction between shaving types, only good or bad surfaces produced on the wood. I set out to produce a Type I shaving after seeing a picture in Bruce Hoadleys book Understanding Wood that shows a thick shaving that is segmented, having been broken at regular intervals just as in the books illustrations of a Type I chip. The caption says the shaving was pared from the edge of a board by a jointer plane with [a] sharp iron and closely set cap. Using a jack plane, I started to take shavings from the edge of a soft pine board. The first ones appeared to be Type II, so I increased the set of the blade to take a thicker shaving and planed several species of wood. All of the shavings seemed to be Type II. Planing both with and against the grain, the shavings were smooth and continuous. All of them were curly and some were rippled, but none seemed to be broken at regular intervals. For this test the cap iron was set 1/32 behind the blade edge and the mouth of the plane was also about 1/32. When the shaving thickness was increased to .009 a shaving taken from soft pine did show regular breaks. Heres how it looks at 60 power:
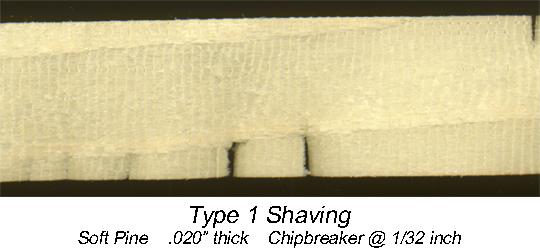
This shaving was very curly and felt rougher on the side that curled out. The same blade setting did not produce a Type I chip on elm. I increased the shaving thickness to .020 and continued to take segmented shavings. Heres a scan of one of them:
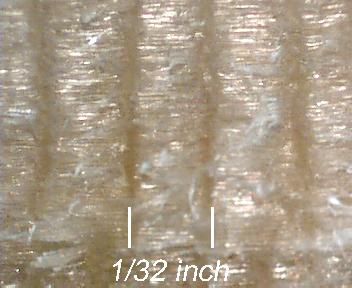
In this image the width of the shaving is about 3/4 inches. Its probably no coincidence that the distance between breaks in the shaving is the same as the size of the planes mouth. In my test, the quality of the surface got progressively worse as the shaving thickness increased. The surface quality was very bad when the shaving thickness reached .020. Thats over ten times the thickness of my usual shavings, and was possible only because I was planing a narrow edge of a very soft board. Setting the chipbreaker closer to the blade edge changed the nature of the shaving in an unexpected way. With the cap iron 1/64 from the edge, it was difficult to push the plane even when the shaving thickness was about .007. The shaving was much less curly and had a wide band that was rippled between narrow bands that were flat. The rippled band moved back and forth from side to side following the latewood in the grain. This is probably peculiar to the soft pine I was using for the test. Heres a scan of one of these shavings:
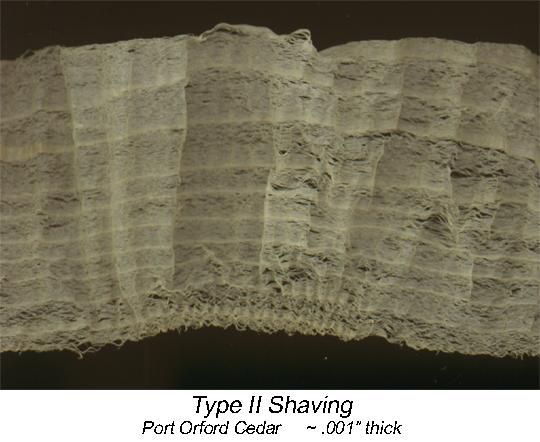
For comparison, heres a scan of a wider shaving that is about as thin as Ive been able to produce:
Even this quick experiment is enough to convince me that for smoothing planes with bed angles of 45º to 50º, most shavings are Type II. I hope to see if I can produce a Type 0 shaving using a lower cutting angle, but havent tried yet. For much higher bed angles, a Type III shaving may be formed.
|

|
[Home] [Summary of Results] [Testing Procedure] [Chipbreaking] [Cutting Angles] [Shaving Formation] [Making Shavings] [Tuning Infill Planes] [Links & References] [Contact] [Site Map] |